Localize Applications With AI
Other languages: EspañolFrançaisDeutsch日本語한국어Português中文
Whether you are thinking of localizing your project or just learning how to do that, AI might be a good start. It offers a cost-efficient entry point for experiments and automations.
In this post, we will walk through one such experiment. We will:
- choose an open-source application
- review and implement the prerequisites
- automate the translation stage using AI
If you’ve never dealt with localization and would like to learn, it might be a good idea to start here. Except for a few technical details, the approach is largely universal, and you can apply it in other types of projects.
If you’re already familiar with the basics, and just want to see AI in action, you might want to skip to Translate texts or clone my fork to skim over the commits and evaluate the results.
Get the project
Creating an application just for a localization experiment would be overkill, so let’s fork some open-source project. I chose Spring Petclinic, an example web app that is used to showcase the Spring framework for Java.
gh repo fork https://github.com/spring-projects/spring-petclinic --clone=trueIf you haven’t used Spring before, some code snippets might not look familiar to you, but, as I already mentioned, this discussion is technology-agnostic. The steps are roughly the same regardless of the language and framework.
Internationalization
Before an application can be localized, it has to be internationalized.
Internationalization (also spelled i18n) is the process of adapting software to support different languages. It usually begins with externalizing the UI strings to special files, commonly referred to as resource bundles.
Resource bundles hold the text values for different languages:
en.json:
{
  "greeting": "Hello!",
  "farewell": "Goodbye!"
}
es.json:
{
  "greeting": "¡Hola!",
  "farewell": "¡Adiós!"
}
For these values to make their way to the UI, the UI must be explicitly programmed to use these files.
This typically involves an internationalization library or a built-in language feature, whose purpose is to replace UI texts with the correct values for a given locale. Examples of such libraries include i18next (JavaScript), Babel (Python), and go-i18n (Go).
Java supports internationalization out-of-the-box, so we don’t need to bring additional dependencies into the project.
Examine the sources
Java uses files with the .properties extension to store localized strings for the user interface.
Luckily, there are already a bunch of them in the project. For instance, here’s what we have for English and Spanish:
welcome=Welcome
required=is required
notFound=has not been found
duplicate=is already in use
nonNumeric=must be all numeric
duplicateFormSubmission=Duplicate form submission is not allowed
typeMismatch.date=invalid date
typeMismatch.birthDate=invalid datewelcome=Bienvenido
required=Es requerido
notFound=No ha sido encontrado
duplicate=Ya se encuentra en uso
nonNumeric=Sólo debe contener numeros
duplicateFormSubmission=No se permite el envío de formularios duplicados
typeMismatch.date=Fecha invalida
typeMismatch.birthDate=Fecha invalidaExternalizing UI strings is not something all projects universally do. Some projects may have these texts directly hard-coded into the application logic.
Externalizing UI texts is a good practice with advantages beyond internationalization. It makes the code easier to maintain and promotes consistency in UI messages. If you are starting a project, consider implementing i18n as early as possible.
Test run
Let’s add a way to change the locale through URL parameters. This will allow us to test if everything is fully externalized and translated to at least one language.
To achieve this, we add the following class to manage the locale parameter:
import java.util.Locale;

@Configuration
public class WebConfig implements WebMvcConfigurer {

	@Bean
	public LocaleResolver localeResolver() {
		SessionLocaleResolver slr = new SessionLocaleResolver();
		slr.setDefaultLocale(Locale.US);
		return slr;
	}

	@Bean
	public LocaleChangeInterceptor localeChangeInterceptor() {
		LocaleChangeInterceptor lci = new LocaleChangeInterceptor();
		lci.setParamName("lang");
		return lci;
	}

	@Override
	public void addInterceptors(InterceptorRegistry registry) {
		registry.addInterceptor(localeChangeInterceptor());
	}
}
Now that we can test different locales, we run the server, and compare the home page for several locale parameters:
- http://localhost:8080 – default locale
- http://localhost:8080/?lang=es – Spanish
- http://localhost:8080/?lang=ko – Korean
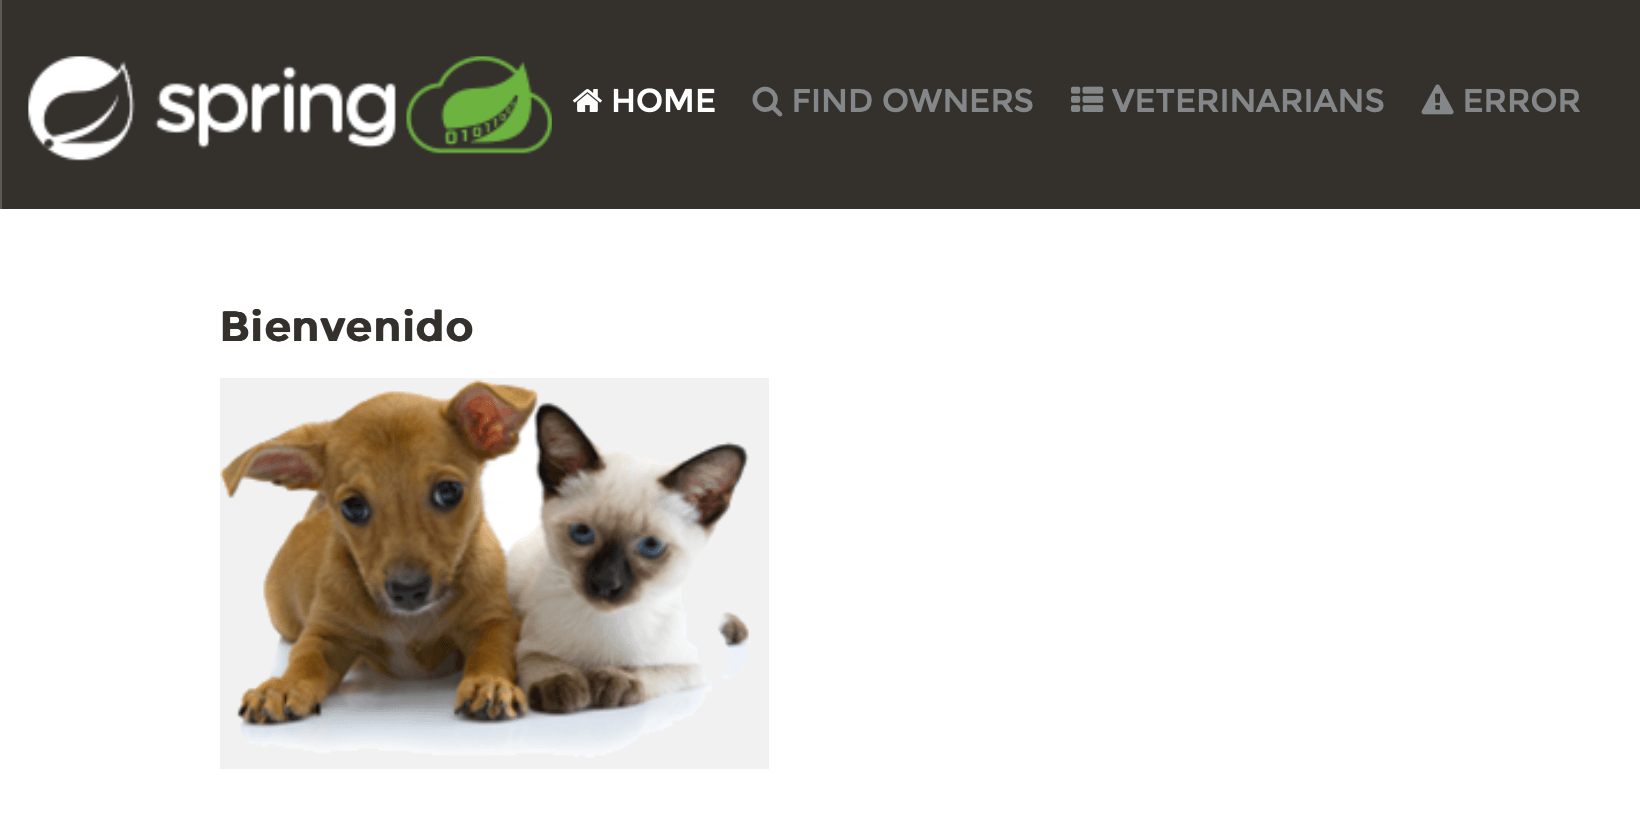
Changing the locale is reflected in the UI, which is good news. It appears, however, that changing the locale has only affected a portion of the texts. For Spanish, Welcome has changed to Bienvenido, but the links in the header remained the same, and the other pages are still in English. This means we have some work to do.
Modify templates
The Spring Petclinic project generates pages using Thymeleaf templates, so let’s inspect the template files.
Indeed, some of the texts are hard-coded, so we need to modify the code to refer to the resource bundles instead.
Luckily, Thymeleaf has good support for Java .properties files,
so we can incorporate references to the corresponding resource bundle keys right in the template:
<h2>Find Owners</h2><h2 th:text='#{heading.find.owners}'>Find Owners</h2>heading.find.owners=Find OwnersThe previously hard-coded text is still there, but now it serves as a fallback value, which will only be used if there is an error retrieving a proper localized message.
The rest of the texts are externalized in a similar manner; however, there are several places that require special attention. For example, some of the warnings come from the validation engine and have to be specified using Java annotation parameters:
@Column(name = "first_name")
@NotBlank
private String firstName;@Column(name = "first_name")
@NotBlank(message = "{field.validation.notblank}")
private String firstName;In a couple of places, the logic has to be changed:
<h2>
    <th:block th:if="${pet['new']}">New </th:block>Pet
</h2>
In the example above, the template uses a condition. If the new attribute is present, New is added to the UI text.
Consequently, the resulting text is either New Pet or Pet depending on the presence of the attribute.
This may break localization for some locales, because of the agreement
between the noun and the adjective. For example, in Spanish, the adjective would be
Nuevo or Nueva
depending on the gender of the noun, and the existing logic doesn’t account for this distinction.
One possible solution to this situation is to make the logic even more sophisticated. It is generally a good idea to shy away from complicated logic whenever possible, so I went with decoupling the branches instead:
<h2>
    <th:block th:if="${pet['new']}" th:text="#{pet.new}">New Pet</th:block>
    <th:block th:unless="${pet['new']}" th:text="#{pet.update}">Pet</th:block>
</h2>
Separate branches will also simplify the translation process and future maintenance of the codebase.
The New Pet form has a trick too. Its Type drop-down is created by passing the collection of pet types to the selectField.html template:
<input th:replace="~{fragments/selectField :: select (#{pet.type}, 'type', ${types})}" />Unlike the other UI texts, the pet types are a part of the application’s data model. They are sourced from a database at runtime. The dynamic nature of this data prevents us from directly extracting the texts to a property bundle.
There are again several ways to handle this. One way is to dynamically construct the property bundle key in the template:
<option th:each="item : ${items}"
        th:value="${item}"
th:text="${item}">dog</option><option th:each="item : ${items}"
th:value="${item}"
th:text="#{'pettype.' + ${item}}">dog</option>In this approach, rather than directly rendering cat in the UI, we prefix it with pettype. , which results in
pettype.cat . We then use this string as a key to retrieve the localized UI text:
pettype.bird=bird
pettype.cat=cat
pettype.dog=dogpettype.bird=pájaro
pettype.cat=gato
pettype.dog=perroYou might have noticed that we have just modified the template of a reusable component. Since reusable components are meant to serve multiple clients, it is not correct to bring client logic in it.
In this particular case, the drop-down list component becomes tied to pet types, which is problematic for anyone who wants to use it for anything else.
This flaw was there from the beginning – see dog as the options’ default text.
We just propagated this flaw further.
This should not be done in real projects and needs refactoring.
Of course, there is more project code to internationalize; however, the rest of it mostly aligns with the examples above. For a complete review of all my changes, you are welcome to examine the commits in my fork.
Add missing keys
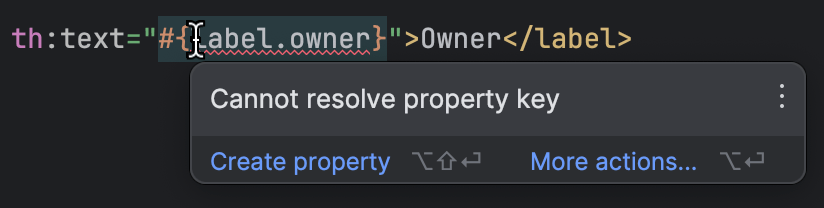
After replacing all UI text with references to property bundle keys, we must make sure to introduce all these new keys. We don’t need to translate anything at this point, just add the keys and original texts to the messages.properties file.
IntelliJ IDEA has good Thymeleaf support. It detects if a template references a missing property, so you can spot the missing ones without lots of manual checking:
With all preparations done, we get to the most interesting part of the work. We have all the keys, and we have all the values for English. Where do we get values for the other languages?
Translate texts
For translating the texts, we will create a script that uses an external translation service. There are plenty of translation services available, and many ways to write such a script. I’ve made the following choices for the implementation:
- Python as the programming language, because it allows you to program small tasks really fast
- DeepL as the translation service. Originally, I was planning to use OpenAI’s GPT3.5 Turbo, but since it is not strictly a translation model, it requires extra effort to configure the prompt. Also, the results tend to be less stable, so I chose a dedicated translation service that first sprung to mind
I did not do extensive research, so these choices are somewhat arbitrary. Feel free to experiment and discover what best suits you.
If you decide to use the script below, you need to create an account with DeepL
and pass your personal API key to the script through the DEEPL_KEY environment variable
This is the script:
import os
import requests
import json

deepl_key = os.getenv('DEEPL_KEY')
properties_directory = "../src/main/resources/messages/"


def extract_properties(text):
    properties = {}

    for line in text:
        line = line.strip()

        if line and not line.startswith('#') and '=' in line:
            key_value = line.split('=')
            key = key_value[0].strip()
            value = key_value[1].strip()
            if key and value:
                properties[key] = value

    return properties


def missing_properties(properties_file, properties_checklist):
    with open(properties_file, 'r') as f:
        text = f.readlines()

    present_properties = extract_properties(text)
    missing = {k: v for k, v in properties_checklist.items() if k not in present_properties.keys()}
    return missing


def translate_property(value, target_lang):
    headers = {
        'Content-Type': 'application/json',
        'Authorization': f'DeepL-Auth-Key {deepl_key}',
        'User-Agent': 'LocalizationScript/1.0'

    }
    url = 'https://api-free.deepl.com/v2/translate'
    data = {
        'text': [value],
        'source_lang': 'EN',
        'target_lang': target_lang,
        'preserve_formatting': True
    }

    response = requests.post(url, headers=headers, data=json.dumps(data))

    return response.json()["translations"][0]["text"]


def populate_properties(file_path, properties_checklist, target_lang):
    with open(file_path, 'a+') as file:
        properties_to_translate = missing_properties(file_path, properties_checklist)
        for key, value in properties_to_translate.items():
            new_value = translate_property(value, target_lang)
            property_line = f"{key}={new_value}\n"
            print(property_line)
            file.write(property_line)


with open(properties_directory + 'messages.properties') as base_properties_file:
    base_properties = extract_properties(base_properties_file)

languages = [
    # configure languages here
    "nl", "es", "fr", "de", "it", "pt", "ru", "ja", "zh", "fi"
]

for language in languages:
    populate_properties(properties_directory + f"messages_{language}.properties", base_properties, language)
The script extracts the keys from the default property bundle ( messages.properties ) and looks for their translations in the locale-specific bundles. If it finds a certain key lacks a translation, the script will request the translation from DeepL API and add it to the property bundle.
I specified 10 target languages, but you can modify the list or add your preferred languages, as long as DeepL supports them.
The script can be further optimized to send the texts for translation in batches of 50. I didn’t do it here to keep things simple.
Later, I updated the script to use an LLM with structured output. You can check out the results here.
Run the script
Running the script across 10 languages took ~5 minutes for me. The usage dashboard shows 8348 characters, which would have cost €0.16 if we were on a paid plan.
As a result, the following files appear:
- messages_fi.properties
- messages_fr.properties
- messages_it.properties
- messages_ja.properties
- messages_nl.properties
- messages_pt.properties
- messages_ru.properties
- messages_zh.properties
Also, missing properties are added to:
- messages_de.properties
- messages_es.properties
But what about the actual translations? Can we see them already?
Check the results
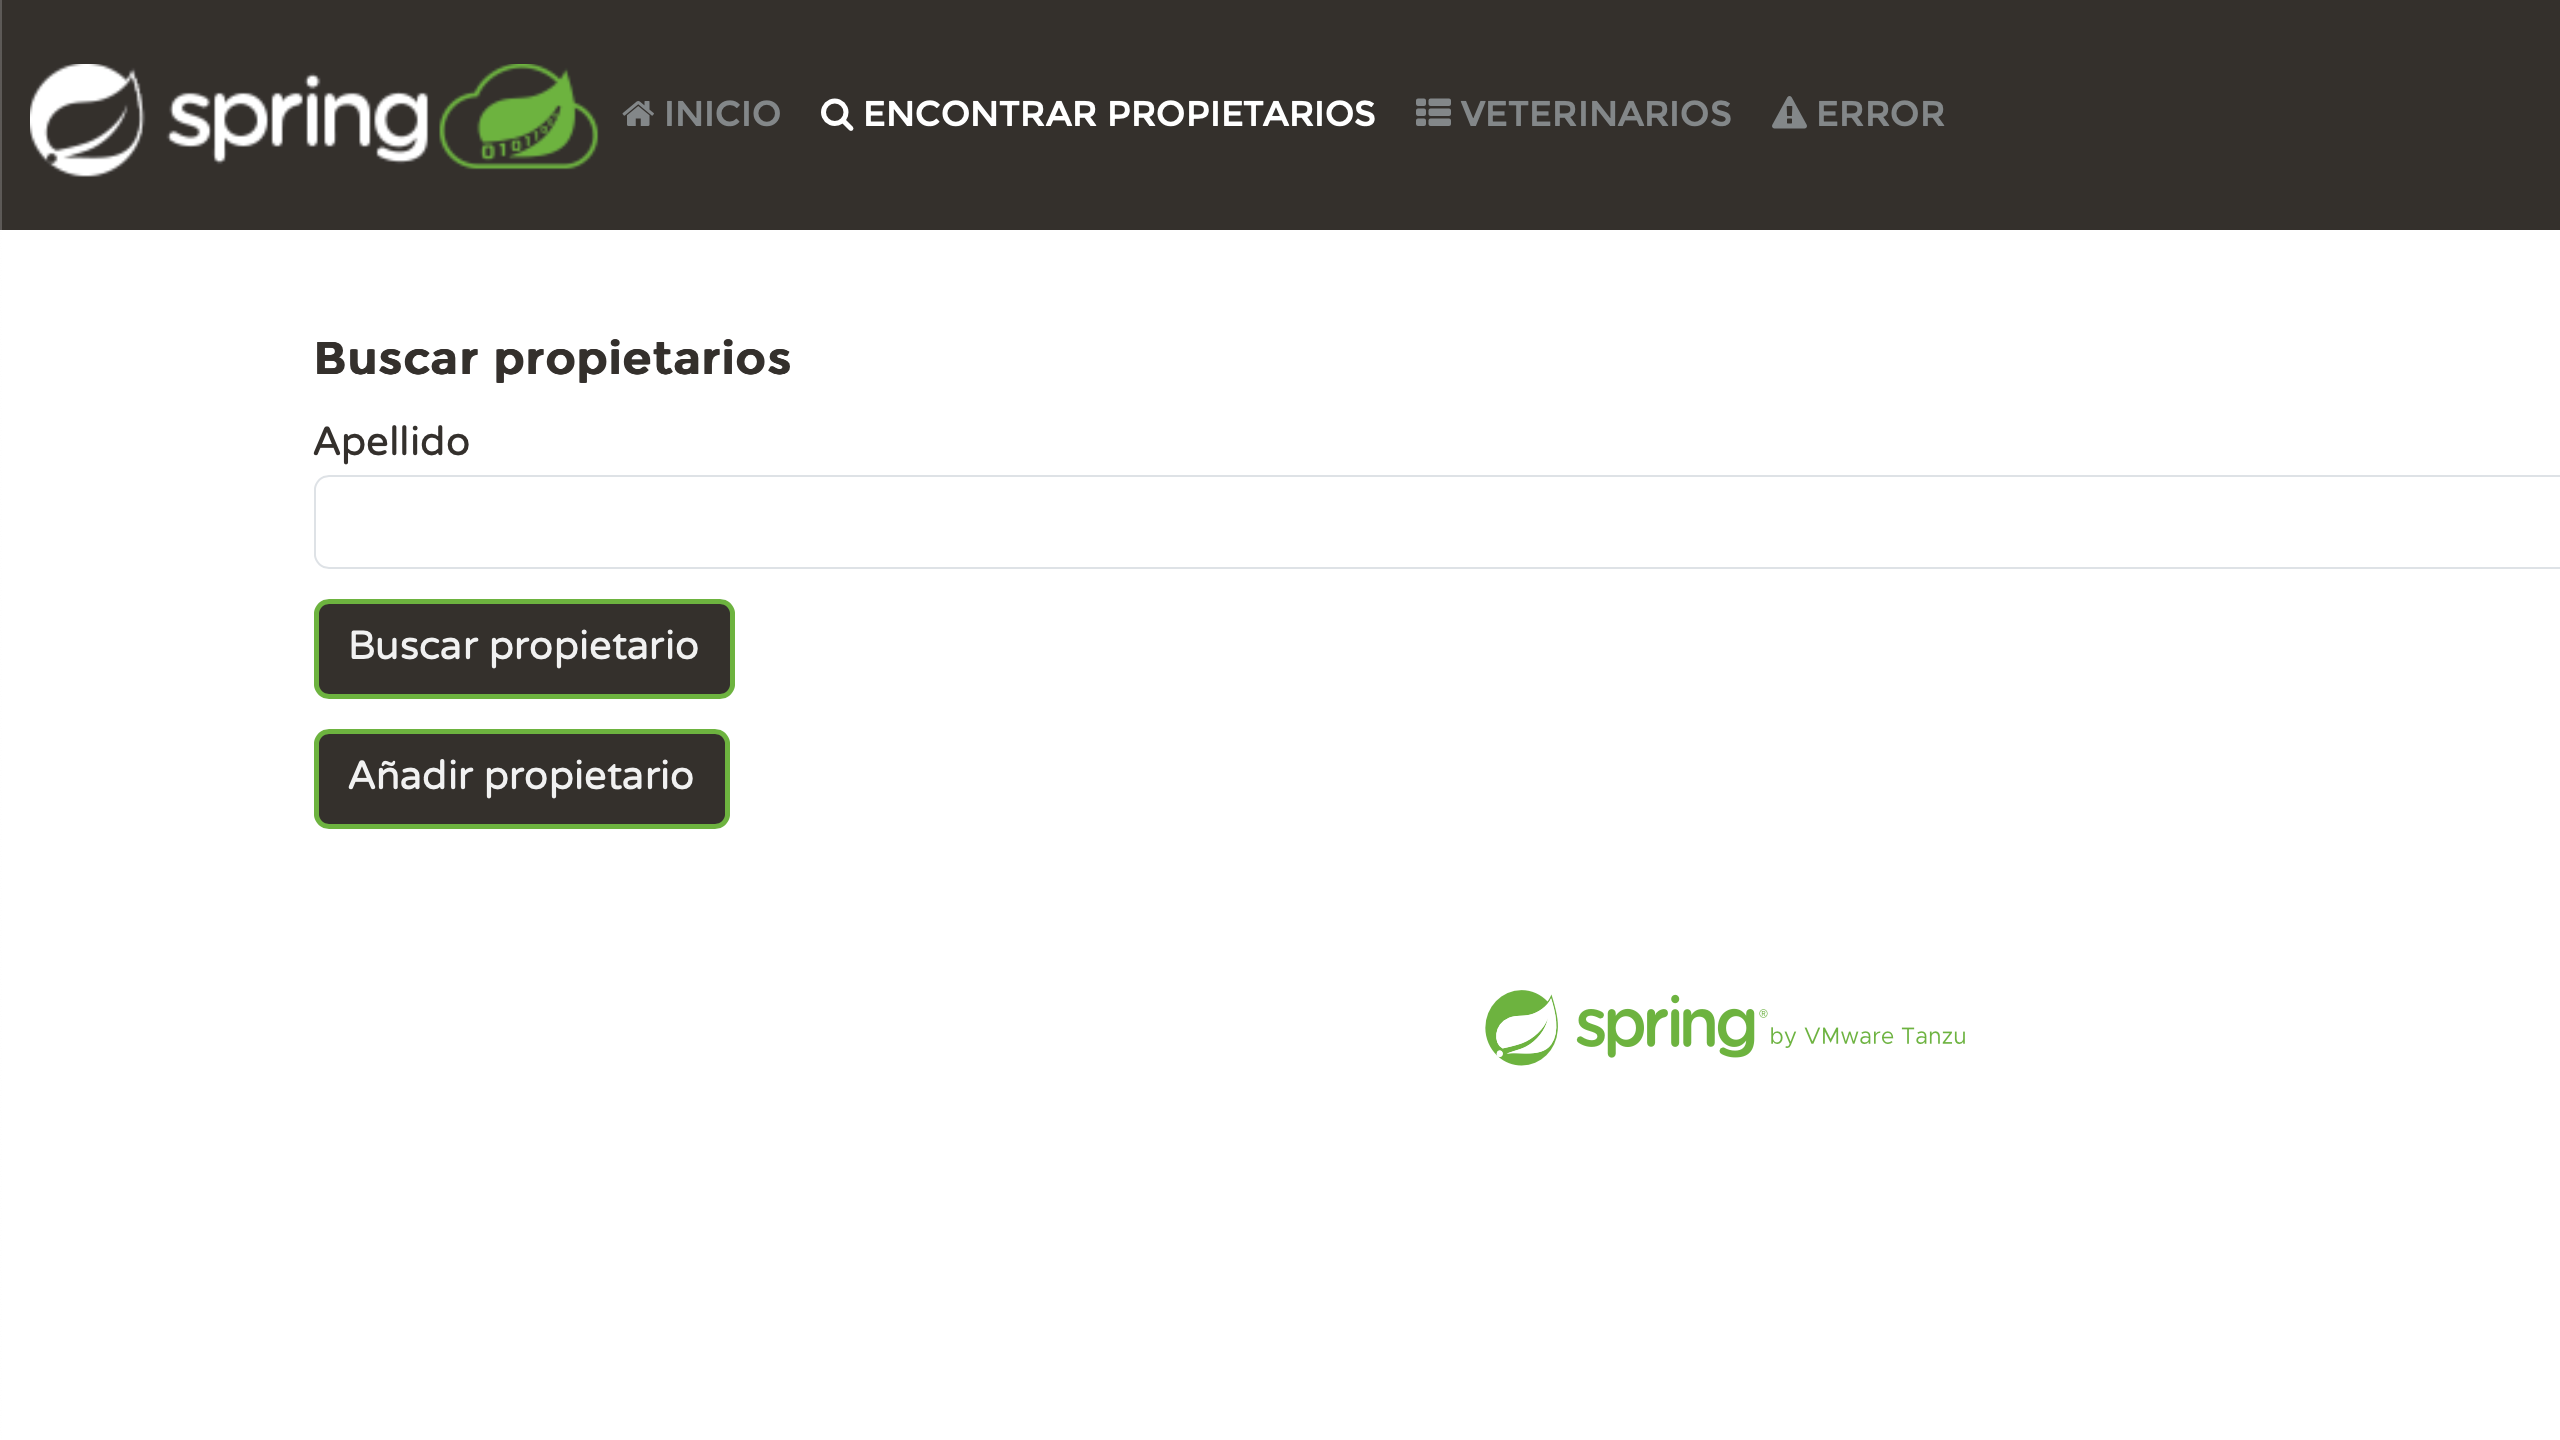
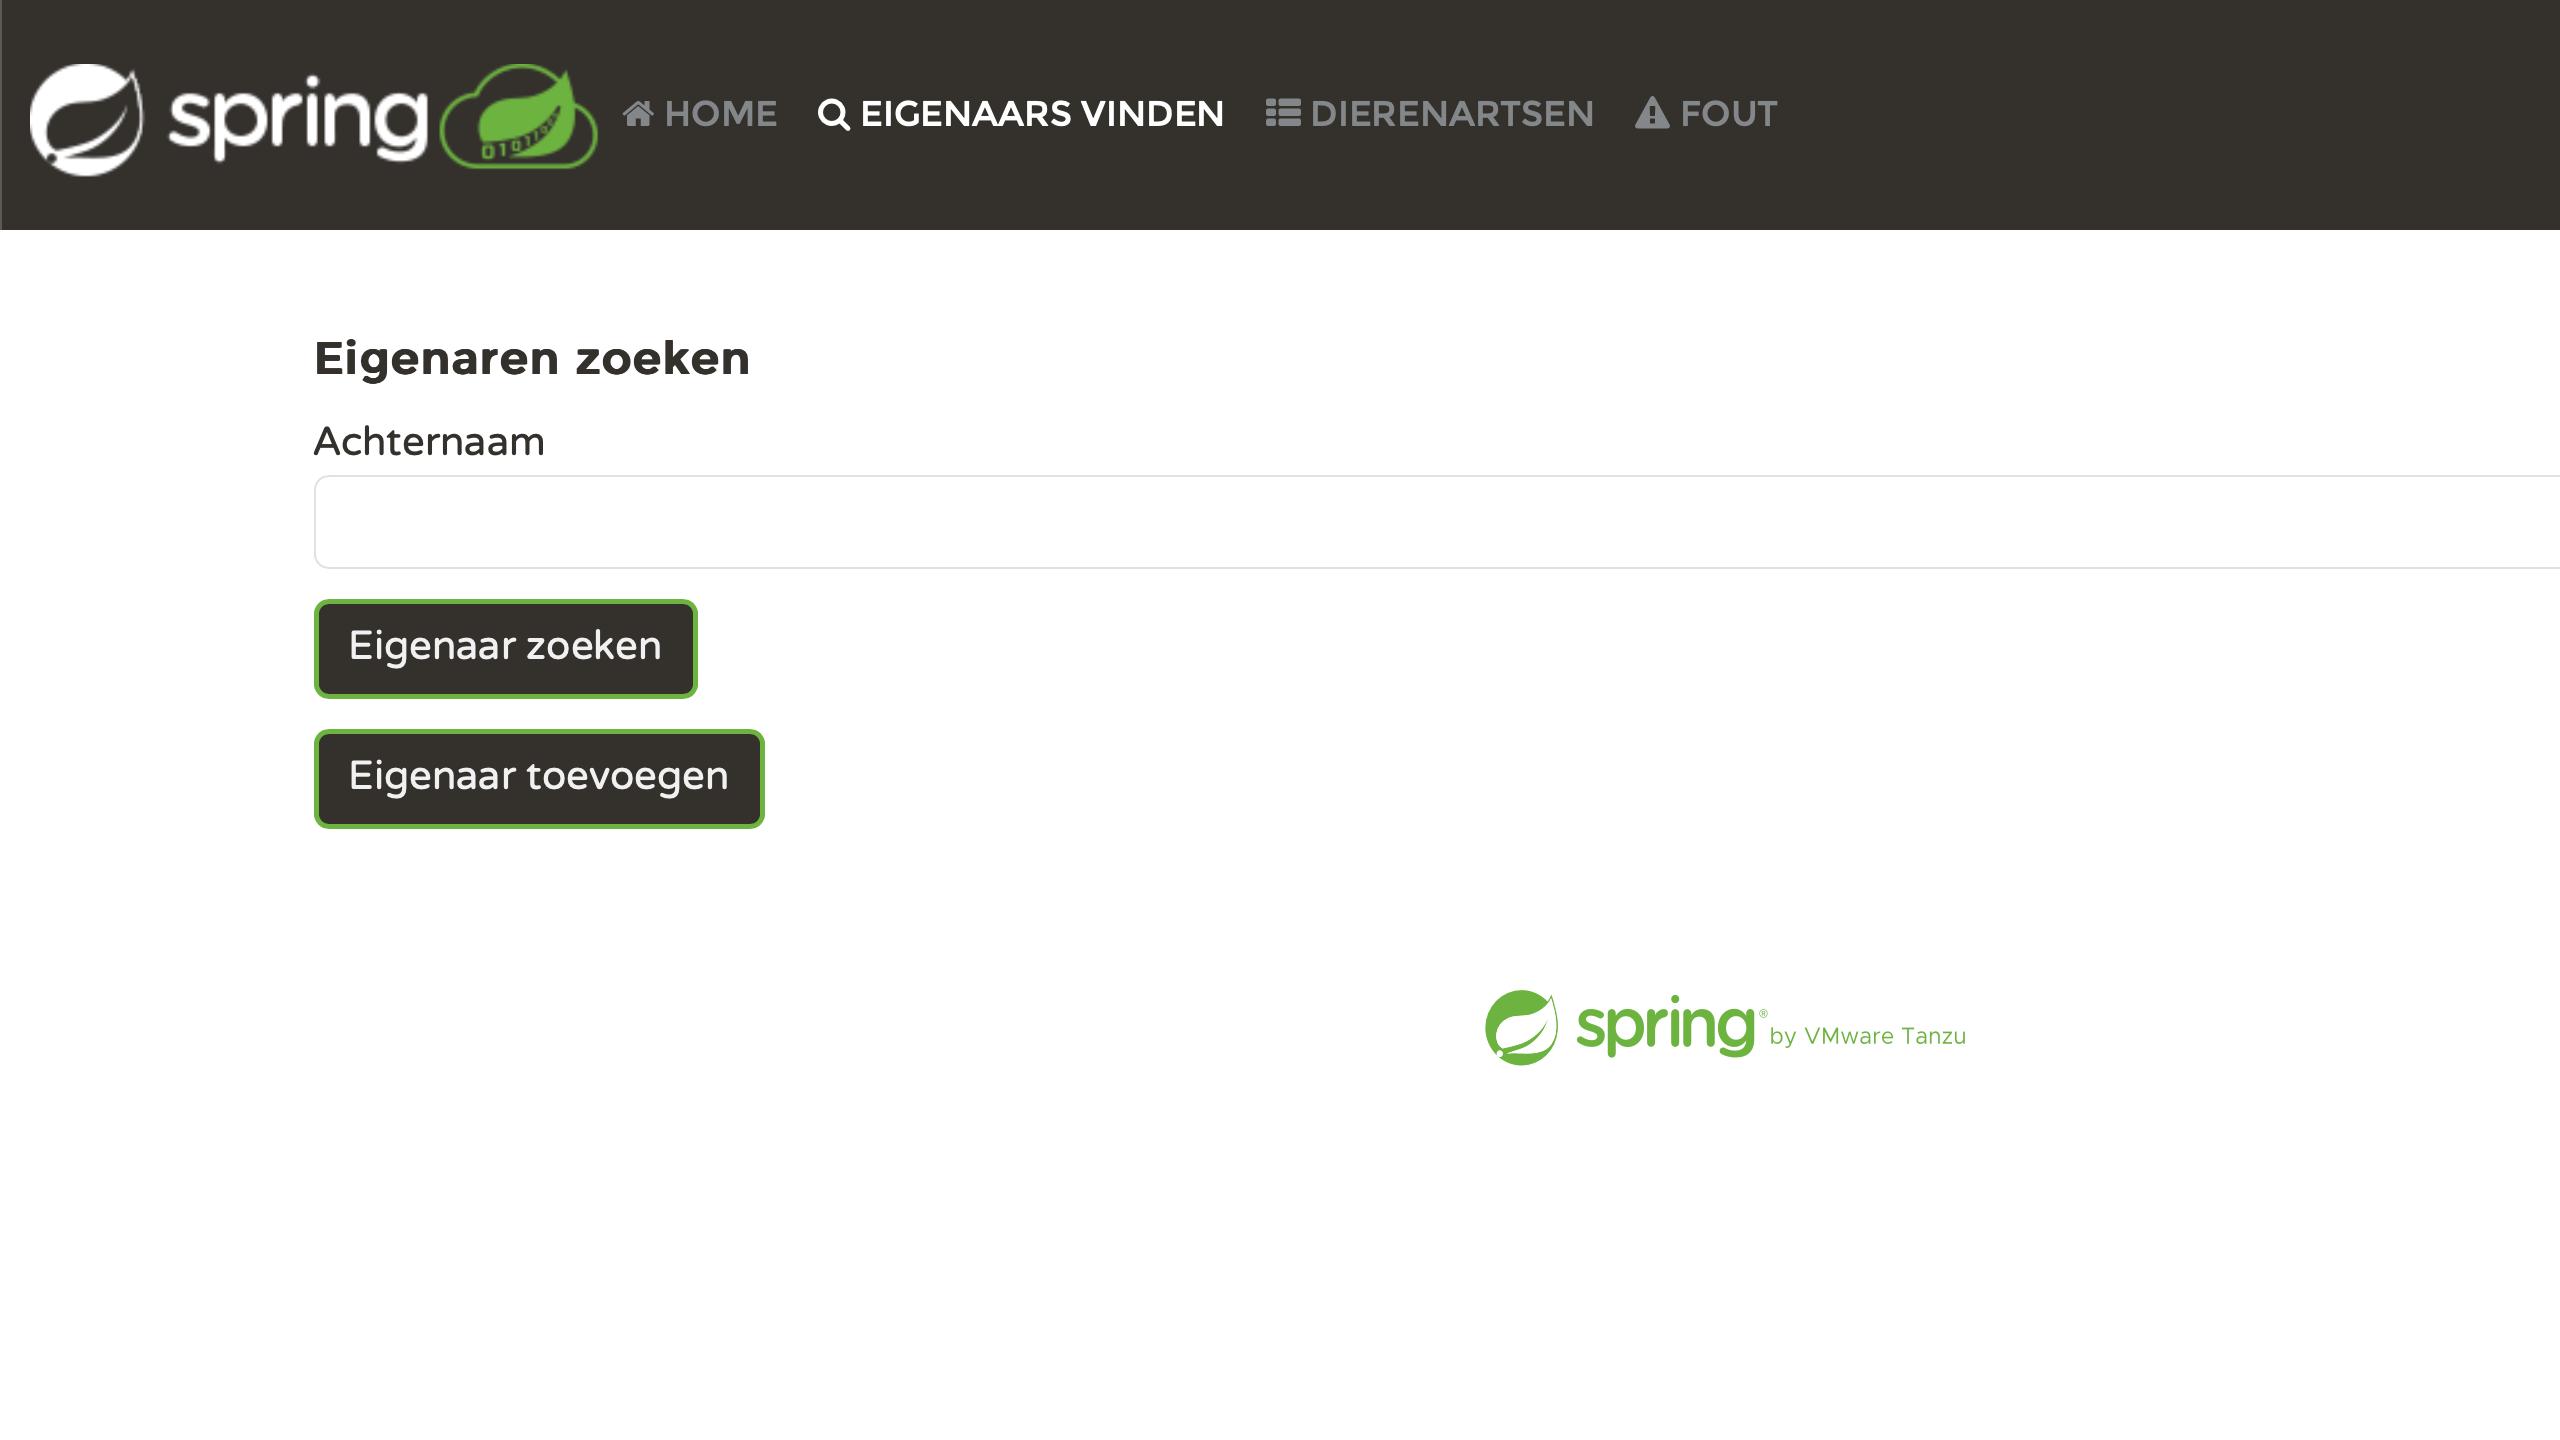
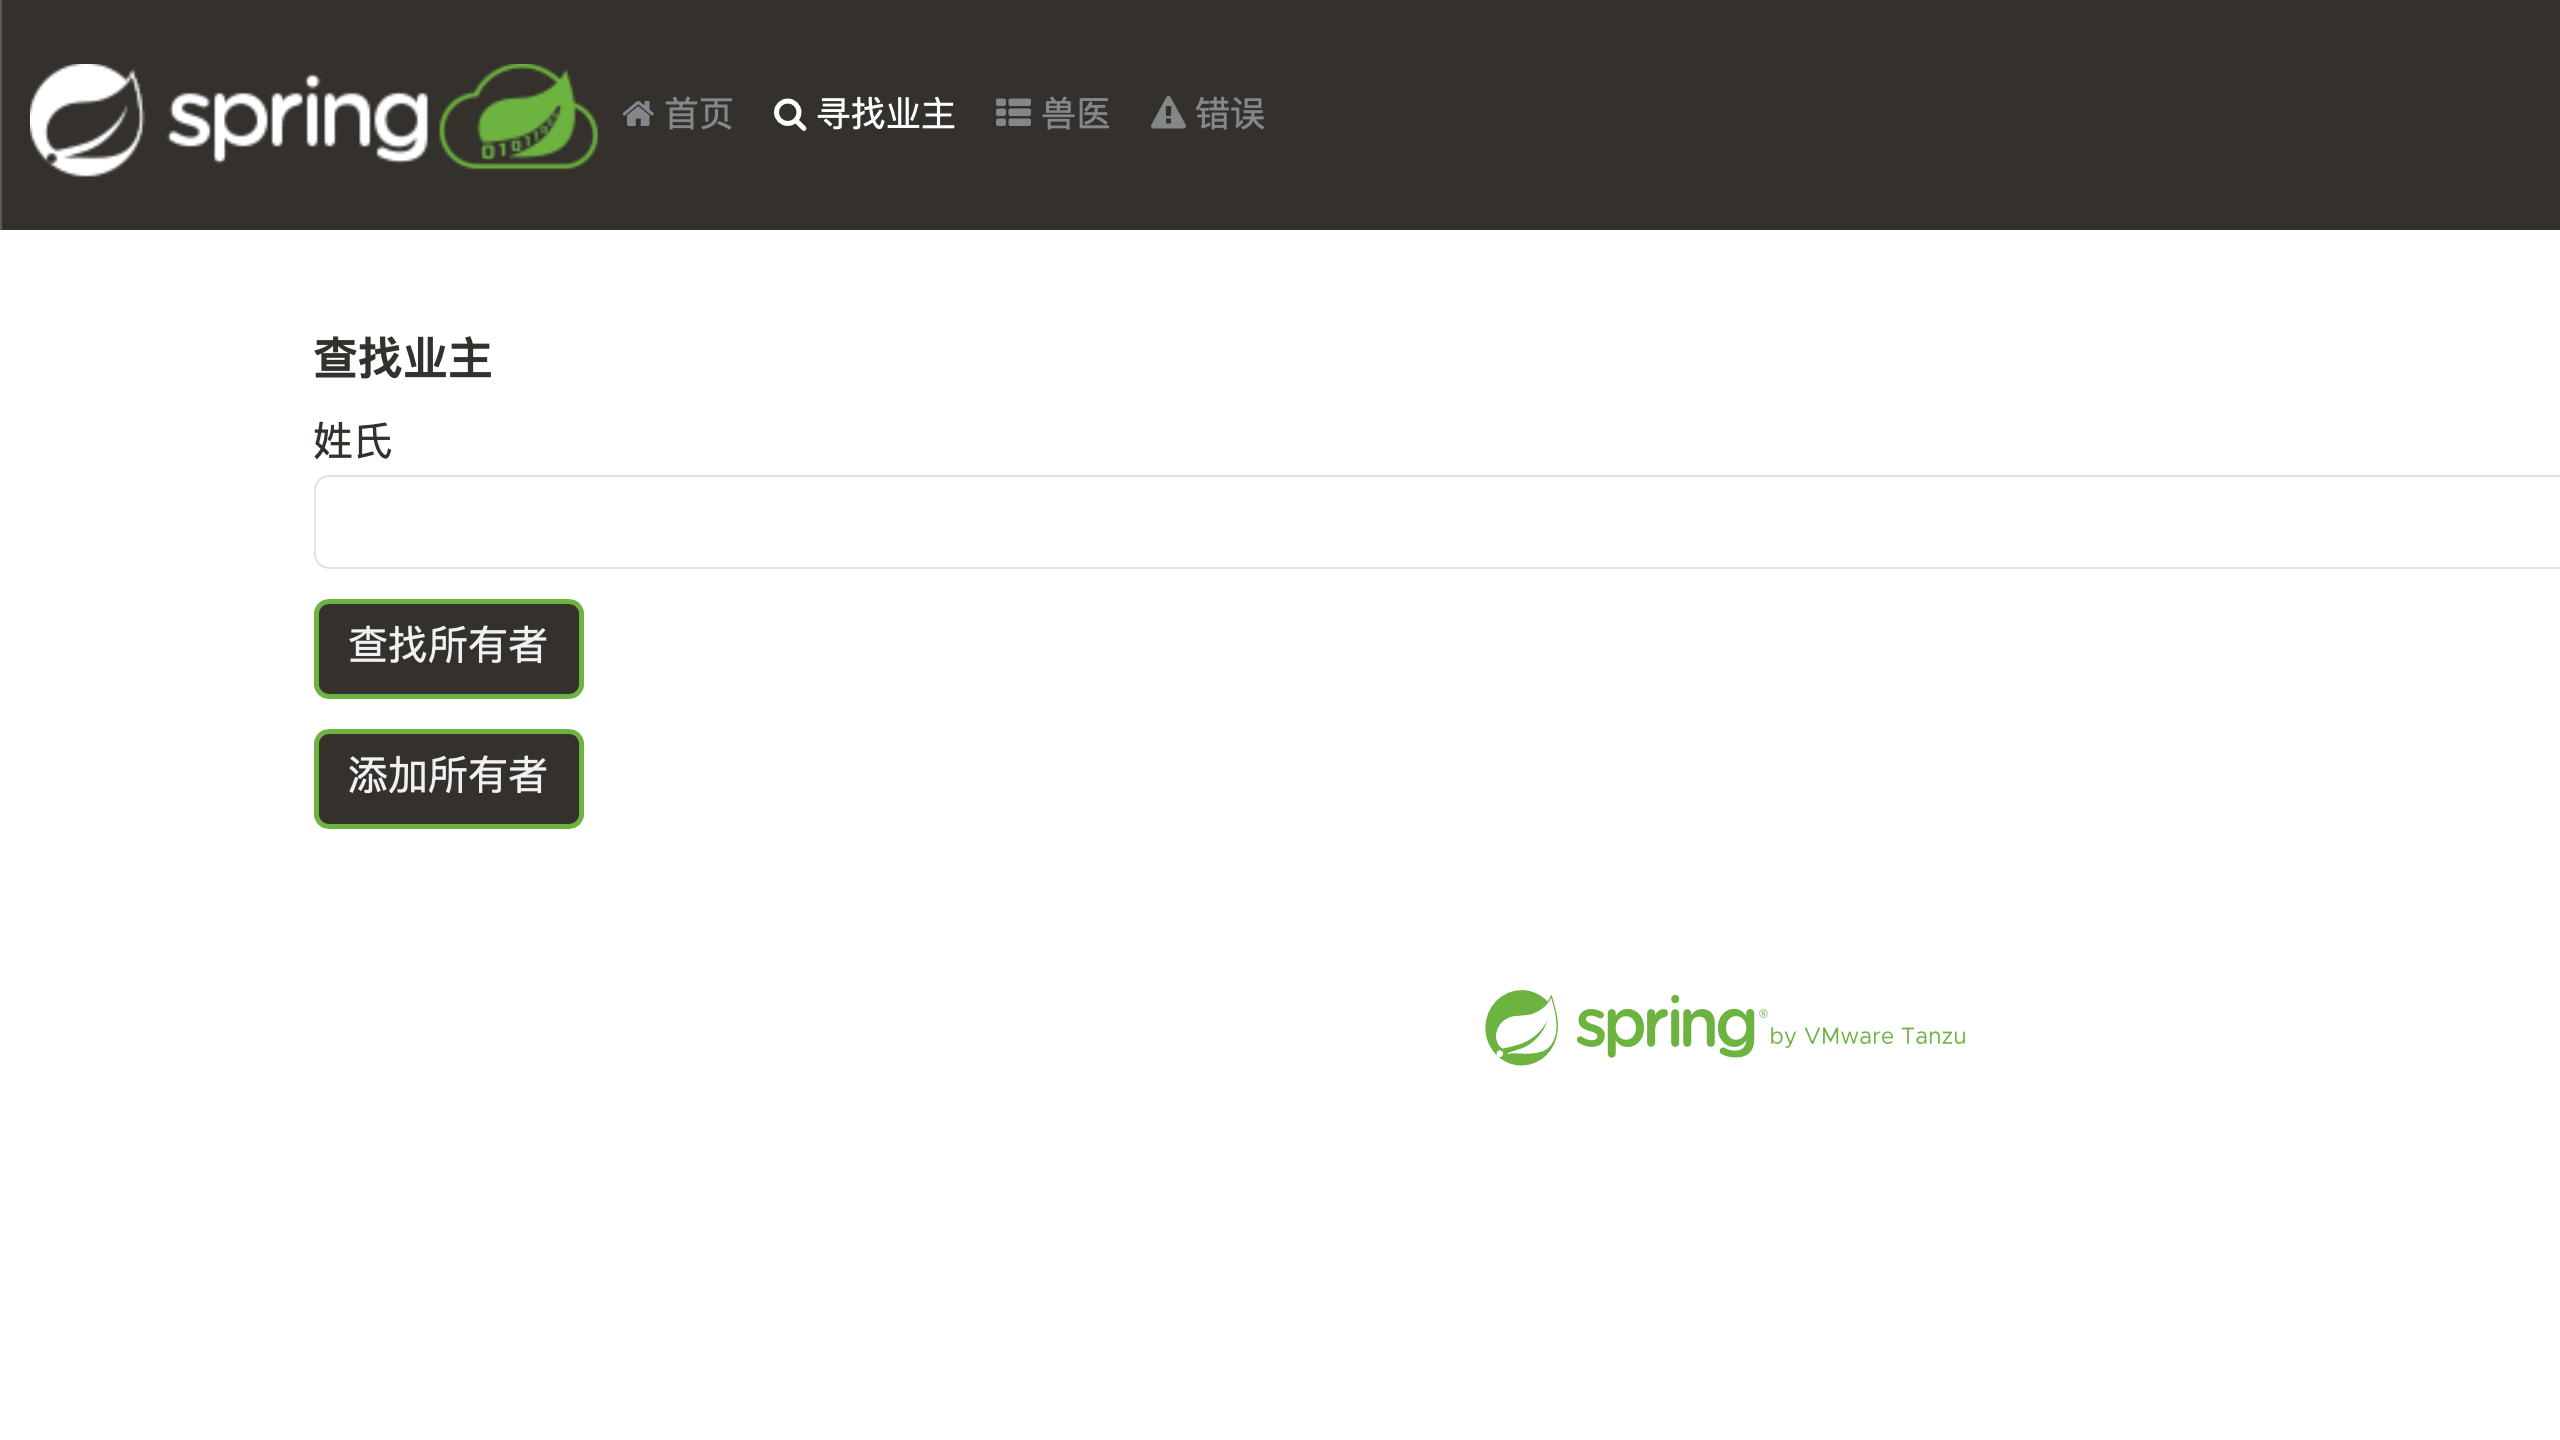
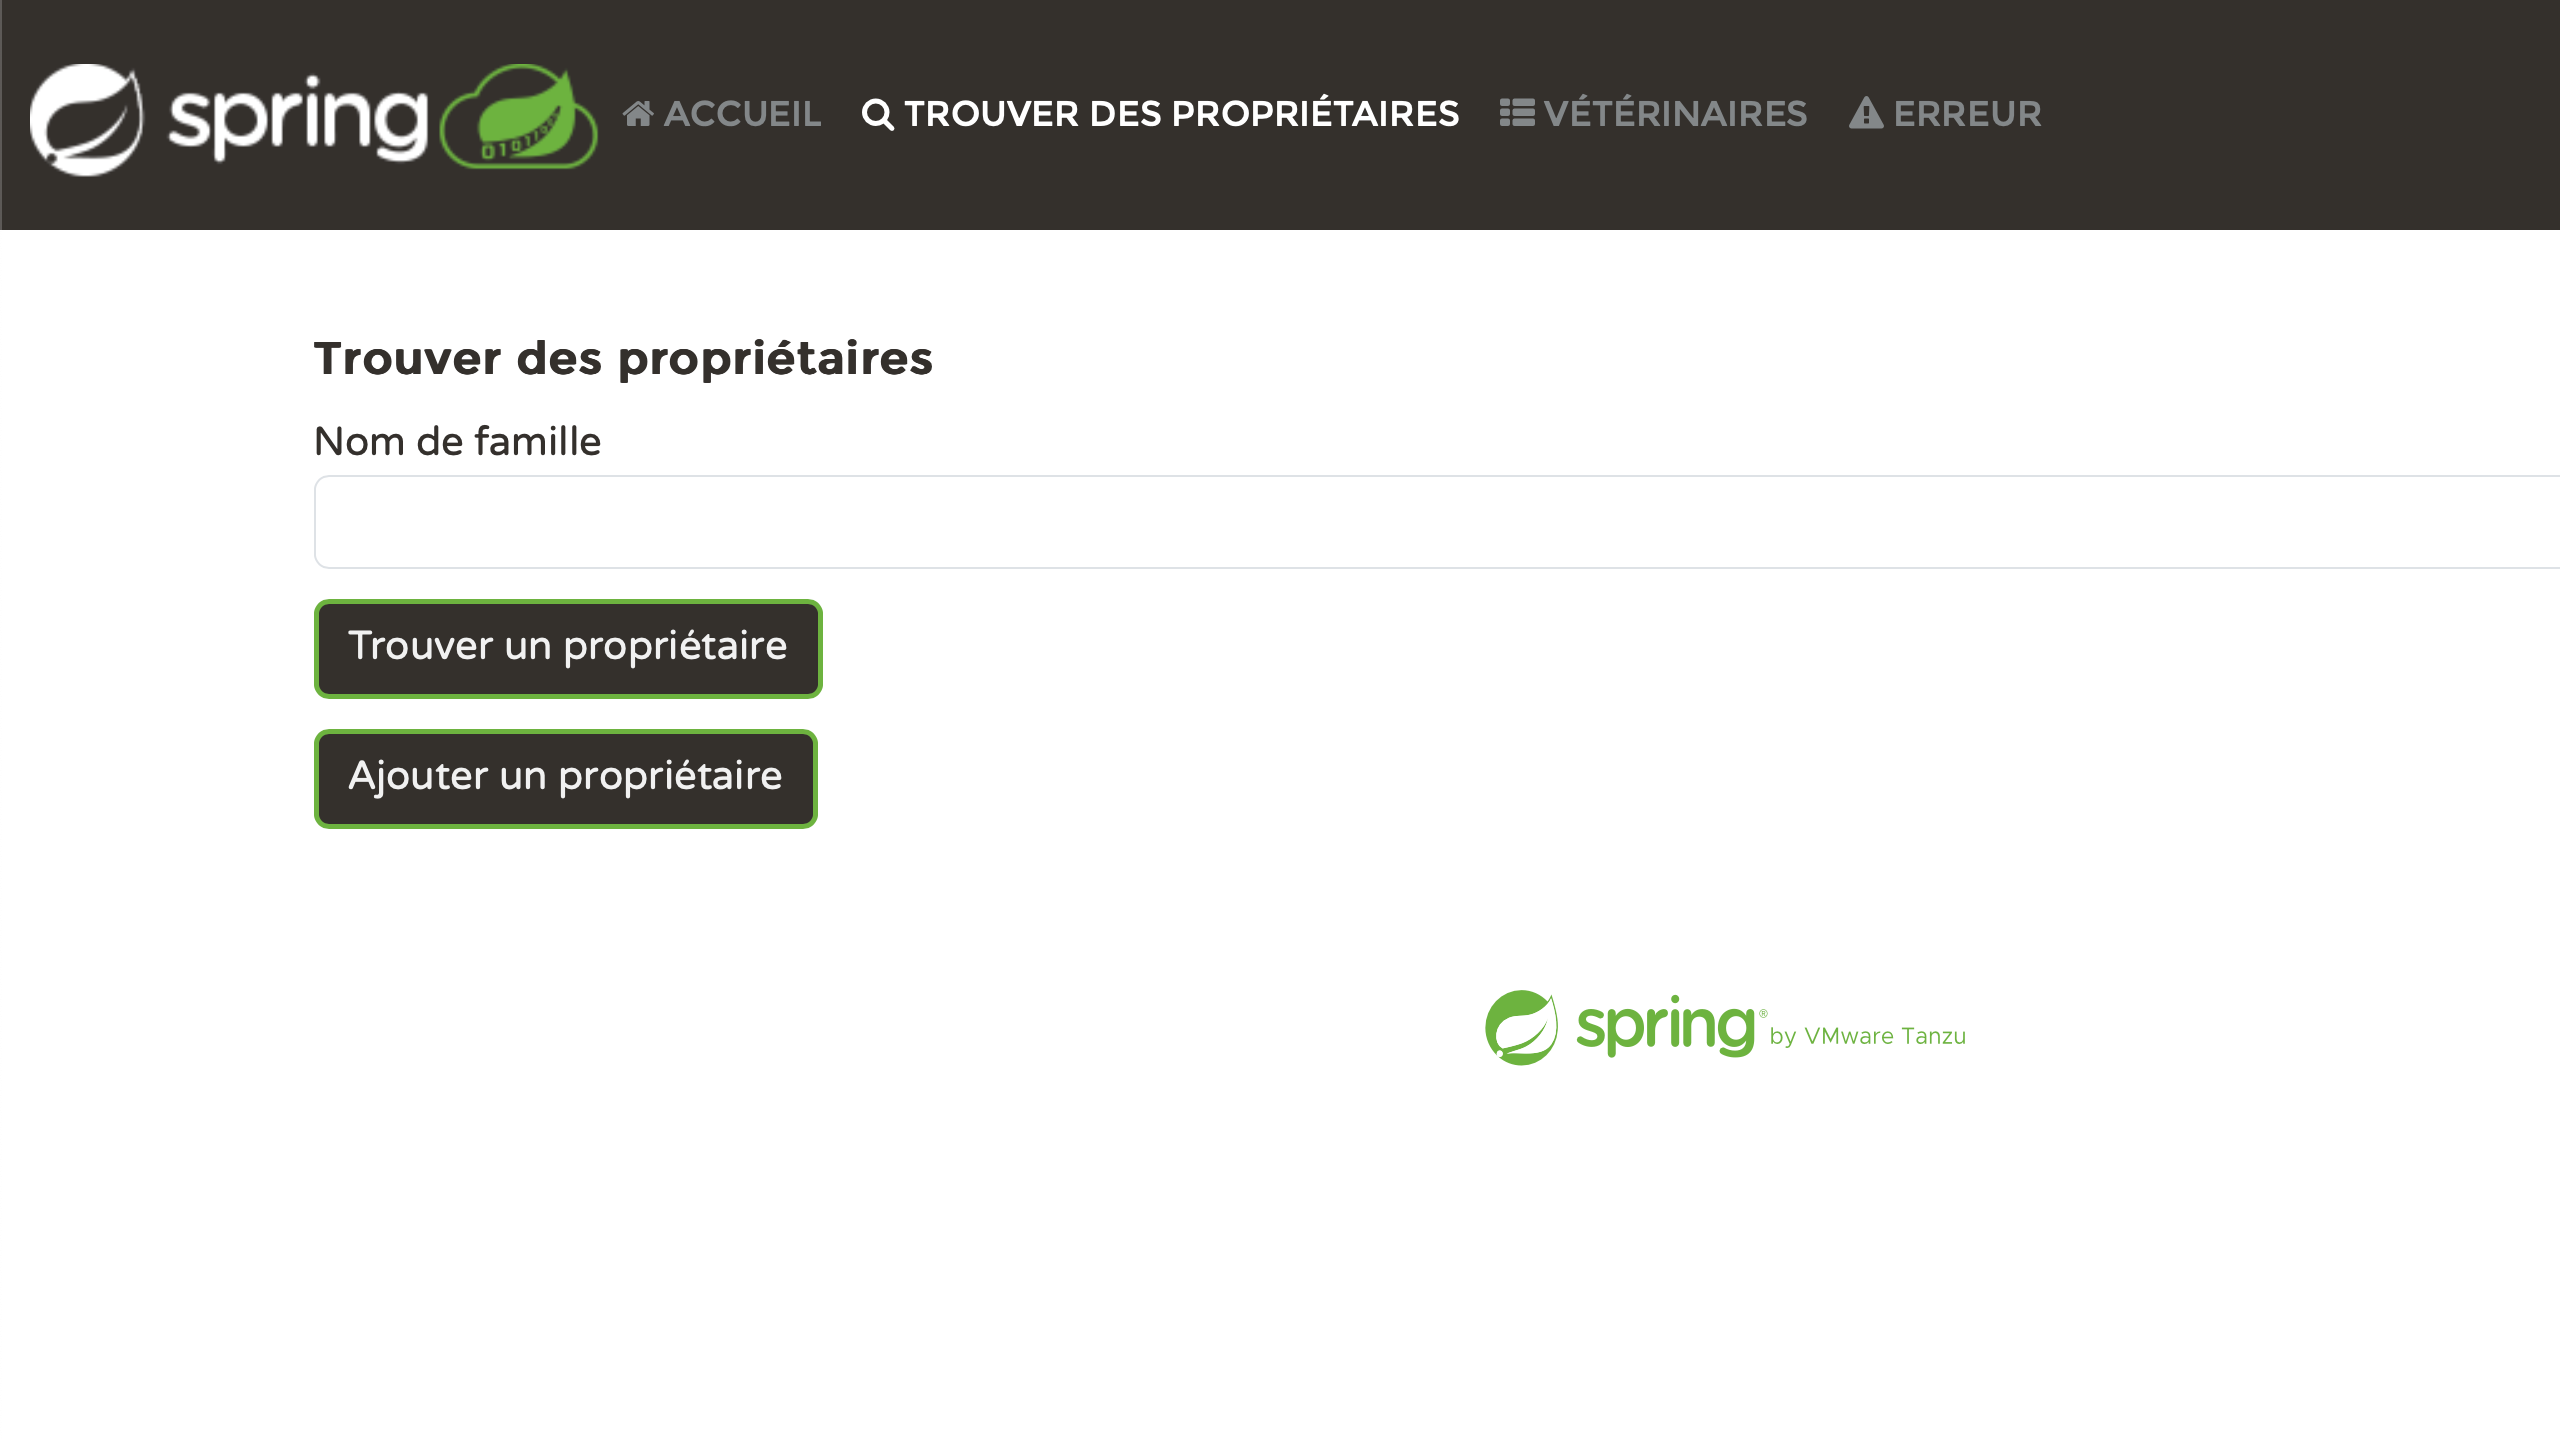
Let’s relaunch the application and test it using different lang parameter values. For example:
- http://localhost:8080/?lang=es
- http://localhost:8080/?lang=nl
- http://localhost:8080/?lang=zh
- http://localhost:8080/?lang=fr
Personally, I find it very satisfying to see each page correctly localized. We’ve put in some effort, and now it’s paying off:

Address the issues
The results are impressive. However, if you take a closer look, you may discover mistakes that arise from missing context. For example:
visit.update = Visit Visit can be both a noun and a verb. Without additional context, the translation
service produces an incorrect translation in some languages.
This can be addressed either through manual editing or by adjusting the translation workflow. One possible solution is to provide context in .properties files using comments:
# Noun. Heading. Displayed on the page that allows the user to edit details of a veterinary visit
visit.update = Visit
We can then modify the translation script to parse such comments and pass them with
the context parameter:
url = 'https://api-free.deepl.com/v2/translate'
data = {
    'text': [value],
    'source_lang': 'EN',
    'target_lang': target_lang,
    'preserve_formatting': True,
    'context': context
}
As we dig deeper and consider more languages, we might come across more things that need to be improved. This is an iterative process.
If there’s one thing that’s indispensable in this process, that’s review and testing. Regardless of whether we improve the automation or edit its output, we will find it necessary to conduct quality control and evaluation.
Beyond the scope
Spring Petclinic is a simple, yet realistic project, just like the problems we’ve just solved. Of course, localization presents a lot of challenges that are out-of-scope for this article, including:
- adapting templates to target grammar rules
- currency, date, and number formats
- different reading patterns, such as RTL
- adapting UI for varying text length
Each of these topics warrants a writing of its own. If you would like to read more, I will be happy to cover these topics in separate posts.
Summary
Alright, now that we’ve finished localizing our application, it’s time to reflect on what we’ve learned:
- Localization is not only about translating texts – it also affects related assets, subsystems, and processes
- While AI is very efficient in some localization stages, human supervision and testing remain necessary to achieve the best results
- The quality of automatic translations depends on a variety of factors, including the availability of context and, in the case of LLMs, a properly written prompt
I hope you enjoyed this article, and I’d love to hear your feedback! If you have follow-up questions or want to discuss the approach, don’t hesitate to get in touch.
Looking forward to seeing you in the future posts!